|
IMS-4000E ホストをネットワークに接続するには,ネットワークに関する情報とホストのIPアドレスを設定します. ホストにネットワーク情報を設定するのにはシリアル端末をコンソールポートに接続する方法と,DHCPサーバーからネットワーク情報をリースする方法があります.工場出荷時にはDHCPクライエントが有効になっており,DHCPサーバーからネットワーク情報を受け取り,Sensaphone Locator プログラムで機器を探索できるようになります. DHCPを使わない場合はシリアルコンソールポートにシリアル端末を接続してネットワーク情報を設定します. 一旦 IPアドレスを設定すると,ウェブブラウザや ConsoleView ソフトウェアからホストにアクセスできるようになります. なお,ノードを使う際にはホストに固定IPアドレスを設定すべきです.
まずホストのネットワーク設定に必要な情報をネットワーク管理者から収集しておきます.
- ホストのIPアドレス
このノードが接続する IMS-4000E ホストの固定IPアドレスです
- サブネットマスク
- デフォールトゲートウェイのIPアドレス
ホストが同一サブネットにない場合はゲートウェイを経由してホストと接続します
- DNSサーバーのIPアドレス
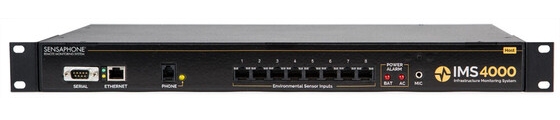
シリアル端末を 9600 baud, no parity, 8 data bits, 1 stop bit に設定して IMS-4000E ノードのシリアルコンソールポート(Dsub 9ピン オス コネクタ)に接続します.PCのシリアルポートやPCに接続したUSBシリアル変換はDTE接続です.ノードのコンソールポートもDTE接続ですから,接続にはクロスシリアルケーブル(Dsub 9 ピン メスコネクタ)を使います.
接続する次のメニューが端末に表示されます. 工場出荷時のパスワードはマニュアルを参照下さい.
Enter option->Sensaphone IMS-4000 Host Unit V1.0.0.0
Enter Password () >***** <パスワードはマニュアルを参照下さい
Main Menu
1. Display Enterprise status
2. Display Network and Option configuration
3. Configure Network settings
4. Configure Enterprise Name
5. Configure Web Server
6. Configure Remote Access Server
7. Enable Two-Way E-mail Responder
8. Enable Microphone Listen-In
9. Enable default Master Administrator Account (temporarily)
0. Enable data modem
A. Configure SNMP
B. Change Admin Password
C. Reset To Factory Defaults
D. Display Statistics
E. Reboot
F. Logout
Enter option->
ここで
1. Display Enterprise status <IMS4000Eで構成されるエンタープライズの構成を表示
2. Display Network and Option configuration <ネットワーク設定の内容の表示
3. Configure Network settings <ネットワーク設定
4. Configure Enterprise Name <エンタープライズの名前の設定
5. Configure Web Server <ウェブサーバーの有効無効の設定
6. Configure Remote Access Server <RASの有効無効、RASのIPアドレスの設定
7. Enable Two-Way E-mail Responder <双方向Emailの有効無効の設定
8. Enable Microphone Listen-In <マイクロホンの有効無効の設定
9. Enable default Master Administrator Account (temporarily) <仮マスターアドミニストレータの有効化
0. Enable data modem <データモデムの有効無効の設定
A. Configure SNMP <SNMPのコミュニティー名の設定、エージェントの有効化
B. Change Admin Password <アドミンのパスワードの変更
C. Reset To Factory Defaults <工場出荷状態に戻します
D. Display Statistics <uptime, free, df の結果を表示
E. Reboot <システムを再起動
F. Logout <ログアウトします
Main Menu
1. Display Enterprise status
2. Display Network and Option configuration
3. Configure Network settings
4. Configure Enterprise Name
5. Configure Web Server
6. Configure Remote Access Server
7. Enable Two-Way E-mail Responder
8. Enable Microphone Listen-In
9. Enable default Master Administrator Account (temporarily)
0. Enable data modem
A. Configure SNMP
B. Change Admin Password
C. Reset To Factory Defaults
D. Display Statistics
E. Reboot
F. Logout
Enter option->
Enterprise Status for <IMS Enterprise>
Unit Type IP Status
Host Host 192.168.0.122 Ok
Press any key to return to main menu
Main Menu
1. Display Enterprise status
2. Display Network and Option configuration
3. Configure Network settings
4. Configure Enterprise Name
5. Configure Web Server
6. Configure Remote Access Server
7. Enable Two-Way E-mail Responder
8. Enable Microphone Listen-In
9. Enable default Master Administrator Account (temporarily)
0. Enable data modem
A. Configure SNMP
B. Change Admin Password
C. Reset To Factory Defaults
D. Display Statistics
E. Reboot
F. Logout
Enter option->
Network and Option Configuration
Physical Address 00:E0:4B:xx:xx:xx
IP Address (DHCP Enabled) 192.168.0.122
Sensaphone Locator Enabled
Enterprise name IMS Enterprise
Web Server Enabled
Remote Access Server Disabled
RAS IP Port Address 0.0.0.0
Two-Way E-mail Responder Disabled
Microphone Listen-in Enabled
Datamodem Enabled
SNMP RO community public
SNMP RW community private
SNMP Agent Disabled
Allow remote configuration Enabled
Press any key to return to main menu
3を入力してネットワークの設定を行います
Enter option->3
Configure Network Settings
1. Set IP Address
2. Set Subnet Mask
3. Set Default Gateway
4. Set DNS IP Address
5. Allow remote configuration
6. Enable/Disable DHCP
7. Enable Sensaphone Locator
8. Return to main menu
Enter option->
ここで1から順番に設定していきます.
Enter option->1
Press ENTER to accept new setting or ESC to cancel
Enter IP Address (0.0.0.0) ><このホストに割り付ける固定IPアドレス> 例:192.168.0.220
Enter option->2
Press ENTER to accept new setting or ESC to cancel
Enter Subnet Mask (255.255.255.0) ><サブネットマスク> 例:255.255.255.0
Enter option->3
Press ENTER to accept new setting or ESC to cancel
Enter Default Gateway (0.0.0.0) ><デフォールトゲートウェイ> 例:192.168.0.10
Enter option->4
Press ENTER to accept new setting or ESC to cancel
Enter DNS Server (0.0.0.0) ><DNSサーバーのIPアドレス> 例:192.168.0.3
Enter option->5
Press ENTER to accept new setting or ESC to cancel
Allow remote configuration (Y/N) (Y) ><遠隔設定の有効無効の設定
Enter option->6
Press ENTER to accept new setting or ESC to cancel
Enable DHCP (Y/N) (N) > <DHCP有効無効の設定,固定IPではN無効
Enter option->7
Press ENTER to accept new setting or ESC to cancel
Enable Sensaphone Locator (Y/N) (Y) ><ロケーターで探索するにはY
Enter option->8
Main Menu
1. Display Enterprise status
2. Display Network and Option configuration
3. Configure Network settings
4. Configure Enterprise Name
5. Configure Web Server
6. Configure Remote Access Server
7. Enable Two-Way E-mail Responder
8. Enable Microphone Listen-In
9. Enable default Master Administrator Account (temporarily)
0. Enable data modem
A. Configure SNMP
B. Change Admin Password
C. Reset To Factory Defaults
D. Display Statistics
E. Reboot
F. Logout
Enter option->
2を入力するとネットワークや運用に関する設定状態が表示されます
Enter option->2
Network and Option Configuration
Physical Address 00:E0:4B:xx:xx:xx
IP Address (DHCP Disabled) 192.168.0.220
Subnet Mask 255.255.255.0
Default Gateway 192.168.0.10
DNS Server 192.168.0.3
Sensaphone Locator Enabled
Enterprise name IMS Enterprise
Web Server Enabled
Remote Access Server Disabled
RAS IP Port Address 0.0.0.0
Two-Way E-mail Responder Disabled
Microphone Listen-in Enabled
Datamodem Enabled
SNMP RO community public
SNMP RW community private
SNMP Agent Disabled
Allow remote configuration Enabled
Press any key to return to main menu
以上で設定は終わりました. IPアドレスの設定には再起動が伴います.新たに設定したIPアドレスを使い,ウェブブラウザかConsoleViewプログラムからホストにアクセスしなおします.
以上
|
 ホスト 親機 DHCP対応